|
Painting realistic, dimensional looking trees is easy using Jungle DVD. The shadows cast by 2D trees often create another set of problems, however. When 2D trees are used as textures, the shadows can look too flat or thin. Problems occur in illustrations as well.
Tree textures just don't cast realistic shadows when the light source is overhead or angled to the side. Because the 2D tree is mapped to a flat panel standing on edge, the shadow depicts the narrowness of panel rather than the volume of a real tree. With illustrations, the problem is getting the shadow to define the ground realistically.
Nozzles work great for shadows because they paint fast and ultra realistic. It's simply a matter of spraying the leaf shadows onto a layer and then applying the finished tree shadow as a texture like the one shown here. The principle works the same for 2D. Just distort the shadow to create the perspective 3D does automatically.
Most any version of Painter will do, whether it's version 6, 7 or 8. If you don't own Painter, download a free evaluation version. Be sure to download our tools (Mac) as well. We've included everything you'll need, including a finished tree and shadow texture.
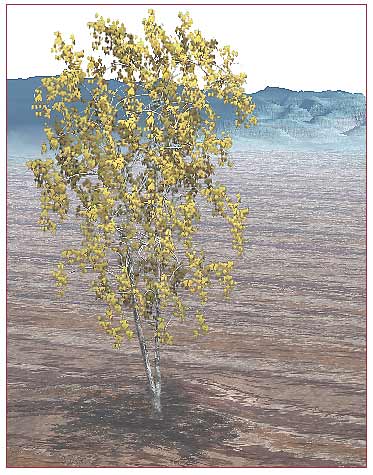
(We suggest completing the Painting Trees tutorial first, so you will have a tree that matches the shadow.)
|
 |
|
1) Launch Painter and display the Tools (Ctrl+1), Brushes (Ctrl+2), Objects (Ctrl+4) and Controls (Ctrl+5) palettes.
2) Launch Paint and open a 512 pixel image.
3) Set Paper Color to black by clicking in the color icon. (Black is used to avoid a white halo around the shadow when the layer is placed over a contrasting surface or used as a texture.)
4) Create a New Layer from the Objects: Layers menu. (You can name the layer by double clicking on the highlighted item in the layer list.)
5) Close the Canvas eye to reveal the underlying checkerboard display.
6) Choose the Load Library command on the Brush palette (see below right) and select the Tree Brushes included with your Jungle DVD tools.
|


|
|
7) Select the Textures Brush on Brush palette.
8) Select the Brush icon on the Tools palette (which will display brush settings on the Controls palette).
|
 |
|
9) Load the "Birch Shadows" nozzle (Ctrl+L) by choosing the Load Nozzle command found on the Nozzle menu at the top of the Brush palette.
10) The default nozzle paints shadows that are too large for the scale of the tutorial tree, so use the Controls: palette to set Size at 20. (Reducing the brush size scales down the shadow size.) Other controls make the brush spray in a more dispersed or random fashion. Set spacing to 150, Min Spacing to 17 and Jitter to .80 as shown.
|
|
|
11) Paint the tree shadow as if you're looking down from above. Use brief brush strokes or random mouse clicks to paint the shadows as dabs.
Tree canopies rarely grow in perfect circles, so you want the shadow to have an irregular shape and edge. Similarly, try to place the greatest density of shadows nearer the center of the tree.
If you don't like the result, use Undo (Ctrl+Z) or simply create a new layer and paint another shadow. This one took me six tries, or about three minutes. These shadow paintings should go quick in other words.
|
 |
|
12) Use Motion Blur to add a sense of motion. (You have to Fill the Canvas background with white in order to see a preview of the blur effect, but make sure to fill the Canvas and not the Shadow layer. Once you've applied the filter, use Select All and Delete to restore the black Paper Color.)
13) If you're working in 2D, use the Distort filter to add a ground plane persepective. Otherwise, you're done. Save the file as .psd to preserve the layer in a common file format.
|
|
|
14) To use the shadow as a texture, select the Shadow layer and choose Drop & Select from the Layer menu (see above right).
15) Use the Save Selection command on the Select menu to save the selection as an alpha channel mask.
16) Save the flattened file in a format recognized by your 3D program. Be sure to choose a format that retains alpha channels (.psd is common).
17) If you're planning to use the shadow as a texture and you don't already have a scene created, open your 3D application and create a ground or terrain model.
|
 |
|
18) Copy and Paste the terrain model to create a duplicate of the original. The terrain copy holds the shadow texture so that it's visible on the ground.
19) Select the model's attributes and add a small positioning increment to the vertical offset so that the copy is slightly above the original terrain model.
20) Map the shadow to the top terrain model using the alpha channel so that the texture maps with transparency. Use a solid grass or ground texture for the lower model.
21) Since shadows are semi-transparent by nature, adjust the shadow's visibility to 80 or 90%.
22) Select the appropriate texture setting to make the image apply once to the model, as it appears in the examples below.
|
 |
|
23) Adjust the texture size to make the shadow fit the scale of the tree and you're done.
These foliage shadow textures have lots of possibilities. The shadow nozzles paint great Gels for casting realistic, soft-edged shadows onto 3D surfaces, or they can be painted directly onto existing textures otherwise used as wall, pavement, cement or other model surfaces.
Painting Tree Shadows is the companion tutorial to Painting Trees. If you haven't done that one already, be sure to give it a try too. Try some of the other Jungle DVD tutorials as well. Painting Structures demonstrates how to work with larger foliage structures, and how to paint trunks and limbs that match. Painting Terrains demonstrates techniques for creating dimensional looking foliage textures that map to irregular terrain models. Painting QTVR Panoramas shows you how to paint a QTVR panorama using Painter's tiling brush stroke effect.
To try other tutorials, or for more info on Jungle DVD, Tree Forestry and other products, please visit us at DigArts Software.
|


|
|
©2002000-2003, Digarts Software All Rights Reserved Worldwide. You are permitted to make one print copy of this tutorial. No part of this tutorial shall otherwise be reproduced or transmitted in any form including, but not limited to electronic, mechanical photocopying, recording or by any other means without prior written permission of DigArts Software. This document may not be used for fee based instruction without prior written permission of DigArts Software.
DigArts Software makes no warranty or representation with respect to this tutorial, the images, or the files including their quality or fitness for a particular purpose. The materials are provided on an "AS IS" basis. DigArts Software will not be liable for direct, indirect, special, incidental or consequential damages or costs arising out of the use or inability to use the tutorial or software included with the tutorial, even if advised of the possibility of such damages.
DigArtstm and Jungle 3Dtm are trademarks of DigArts Software. Paintertm is a trademark of Corel Corporation. Windowstm is a trademark of Microsoft Corporation.
|
|


