|
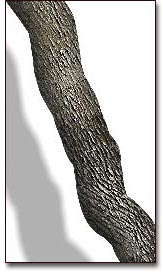
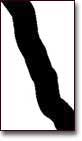
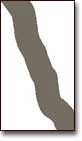
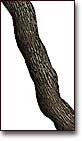
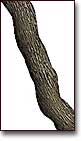
The brush and script links below let you make the tree barks like the one at right. You can use these tools in combination with Jungle DVD to create lifelike tree trunks and limbs. A tip to remember, You have to "load" the TreeBark brush library as well as the FormTree script library. You do that on the Brush palette (below the icons) where the brush name appears to the left. Click on that menu and you'll find Load Library at the very bottom of the list. Find the TreeBark library on your hard drive and select it. The same rule applies to the script library, only you'll use the Script palette (script may not work on new versions of Painter). How it works, 1.) Paint the shape of your tree trunk (see illustrations below). I prefer the flat color Pen with the spacing reduced, but you can use most any brush, or even the selection or shape tools. Once you've created your trunk, make it a floater. If you used the pen and painted on the background, then use the Color Select method to make your selection. It seems to anti alias better than the magic wand. 2.) Fill the trunk floater with a medium brown color. 3.) Load the TreeBark brush and adjust the size of the bark pattern until it's the size you want. (Click on the black dot if the pattern isn't visible). Now, select a very dark brown on the color palette and stroke the brush along the line of the trunk. Remember, you want the underlying color to show through. 4.) Once you've done that, run the script . Presto, it's bark. A word about textures, 5.) You're almost done. However, it looks too clean. It needs a more natural look. To get that, adjust the colors a bit until you get a lighter, more real looking coloration. I generally move Hue towards green about 1-3%, Saturation to minus 10-15%, and Value up 15-25%. In other words, season to taste. 6.) Once you've done that, choose Apply Surface Texture and select Paper as the method. (Try Handmade at about 30%. It's on the default paper palette.) Move the lighting angle to 2,5,8, or 10 o'clock and set Amount to 130. Adjust the Brightness slider to 120 and Apply.
A few other things, This brush can be made to render different sizes based on pen pressure (use the Sliders palette and move the Size slider to Pressure. Next, adjust the +/- Size slider on the Brush Controls: Size palette). If you make a multi-size brush using one of the directional brushes, prepare to wait, however. Painter has to "build" a brush containing a complex assortment of shapes. The added size and direction variables require that Painter calculate the permutations of size and direction as applied to that shape. Even on fast machines this can take several minutes. If you change the brush size sliders, even slightly, Painter will have to recalculate the brush. As a result, you may find yourself spending time waiting for Painter to build the brush when only a minor modification was made. Nevertheless, these variable size settings make for very powerful brushes. Have fun. |
1. 2. 3. 4. 5. 6. |
||||||||||||